


How To Build Your Own WebsiteEasy Step by Step InstructionsThere are 3 simple steps of how to build your own website.
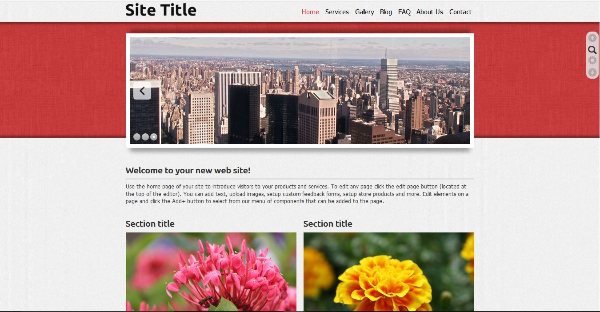
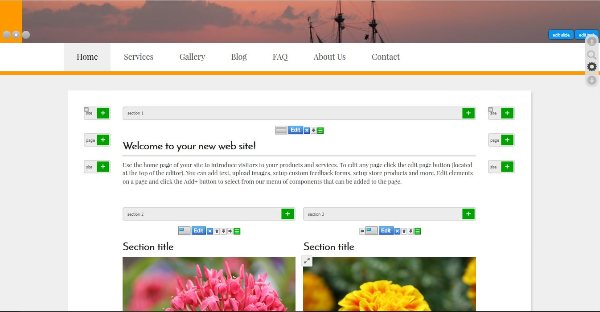
Step 1 - Choose A Platform for Building Your WebsiteBefore you figure out the details of your domain name and the color schemes that will make your website stand out, you first need to decide the platform that you will use to make you own website. About a decade ago, the majority of websites were built using CSS, HTML (code) and sometimes even Flash. They sound difficult, don’t they? You are right, and these methods took too much time to learn and again, mastering the process was rather tricky. In fact, that’s why most of us still assume that you need to do a lot of skill in coding and design to create a website from scratch. Fortunately, things have changed now and that hectic process is long gone history. Today there are a variety content management systems (CMS) or website building platforms that have made creating a website quite simple for anyone; even if you are a complete novice who only uses your computer for light browsing, occasional typing and maybe watching a couple of funny YouTube videos. In other words, building your own website is no longer rocket science. A CMS is basically a user-friendly platform for creating websites and easy management of your own online content, instead of making use of a bunch of loose pages of HTML. There are lots of CMSs you can choose from and your top priority is to select the right one. You wouldn’t want to be halfway through the process of building your site only to find out that the CMS platform you chose is completely unfit for you and what you wanted for your website. You want to avoid such kind of trouble and that’s why it’s best for you to choose eBizWebpages. Why You Should Choose eBizWebpages.comHere’s why eBizWebpages is the best option for easy and fast creation of your website when compared to all other options: 1. USER FRIENDLY EVEN FOR BEGINNERS Furthermore, it is flexible and customizable so that you can make your own website fit your needs exactly as you wish. There are website accessories that can tweak your design to make it pop and other extras that make management way easier. Moreover, if you have some advanced skills up your sleeves, your creativity won’t be restricted; you can add your own code, file formats and even graphics to customize your template as much as you want. Whether you want a simple website or complex ecommerce site, all tools are at your disposal. 2. POWERFUL 3. RESPONSIVE DESIGNS ACROSS ALL DEVICES 4. COMES IN AN AWESOME BUNDLE OF JOY 5. HUGE SUPPORT SYSTEM AT YOUR SERVICE STEP 2 - Choose a catchy and relevant domain name and find a host.Before you make your own website and get it online, there are two main things that you will need: a) A domain name: the web address of your website e.g. nameofyoursite.com Ps: If you already have a domain name in mind, you can skip right to Step 3, the third and final step. What domain name should you pick? Easy starting point: Use Your Top 10 Keywords Be Unique Go With .com, .net or .org extensions or a Local Top Level Domain Extension Choose a Short, Punchy and Memorable Domain Name Keep it short, punchy and memorable. Domain names that are easy to remember have high word-of-mouth and search engine prominence. You wouldn’t want to have a super-cool website the no one will ever remember telling their friends about just because the name of the site is too damn hard to recall. And again, a short domain name is always better because it will be a lot easier to type and remember as well. The domain name that you choose should swiftly roll off the tongue, clearly describe what your website or your business/brand is about (perhaps in a clever manner) and stick in the head! Stick to Letters ONLY! What About Web Hosting? STEP 3 - The Final Step: Setting Up Your eBizWebpages Website & Making It Look AwesomeSo, your domain name and hosting is ready and now the only thing that remains is to make your new website function. In the next couple of minutes, your website will be up and running! With the simple steps that follow, you can make your own website look cool, awesome and professional or just whatever/however you want it to look. Even before you set anything up the eBizWebpages website creator automatically allocates a very basic theme for you just to get you started as quickly as possible. If you wish, you can stick with that and proceed to adding information on your online website builder. Here is how it looks:
Pretty neat and clean, right? However, you don’t want your new website to look exactly the same as anyone else’s, do you? That’s why you should select and customize a design layout that represents your identity as a blogger or as a brand. There are literally hundreds of eBizWebpages themes that you can choose from and customize how you like. To select and customize a design layout for your website, log into your eBizWebpages Dashboard
Lucky for you, everything you need to customize your site is easily labeled, so don’t feel overwhelmed. It isn’t half as complex as it looks. They are just some buttons for options and functions that will help you bring your site to life, exactly as you visualized in your mind. For familiarity purposes, you can take a few quick minutes to explore the dashboard. You will easily understand how everything works on this website maker and be completely fluent with the platform. If you are wondering what all the buttons do, don’t sweat it. In the next couple of minutes, this guide will help you with everything you need to make your own website. Getting Started With The Free eBizWebpages Design Layouts The main aspects of the eBizWebpages themes are:
Once you log in to your dashboard, you have access to hundreds and perhaps even thousands of free themes! Even with the preloaded free theme, you can still customize all aspects of your site exactly how you want. But for now, let’s choose a theme first and you can get back to customizing the rest of your site after that. Click on the “Design” button to get started.
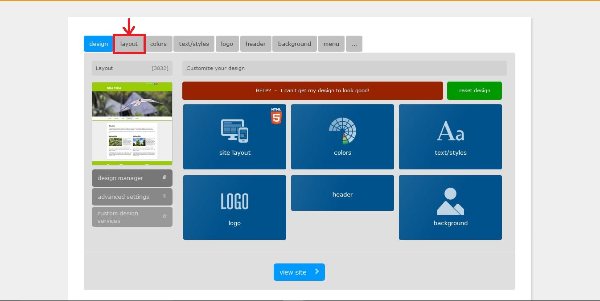
You will be taken to a design mage with more options. From the design page, click on the “layout” button at the top menu bar…
Once you click on “layout” you will be prompted to choose between ‘Select New Design’ and ‘Modify Layout’ options. Since you want to choose your theme from all the available design options, click on the “browse designs” button that is just below the ‘Select New Design’ title as shown:
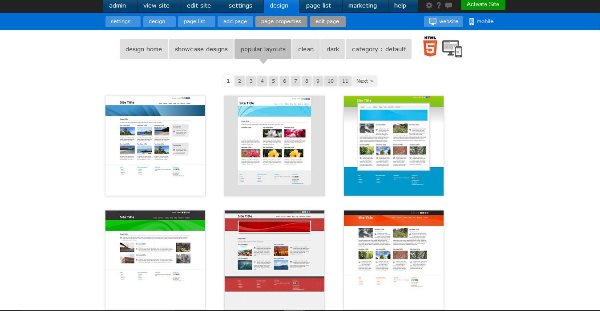
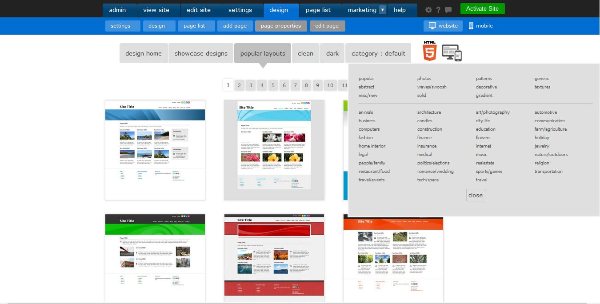
From there, you can browse through all the available themes layouts and choose what pleases you most. The eBizWebpages website creator has already categorized the themes in helpful filters which make section way easier.
These filters are:
How To Load Your Theme Remember, you can always come back to the “layout” button if you would like to edit any aspect of your design. All the available buttons will direct you right to what you would like to change or modify. Feel free to modify, update or change the themes as much as you want, that will have no effected whatsoever on content that you already have. Be assured that nothing bad (e.g. being deleted) will happen to your blog posts, images and pages. They will stay intact. How To Add Pages And Content To Your Website ADDING AND EDITING YOUR PAGES One of the most crucial factors that make the eBizWebpages website builder stand out from many other platforms is that a couple of pages are already created for you. They are:
So, half the work is already done for you.
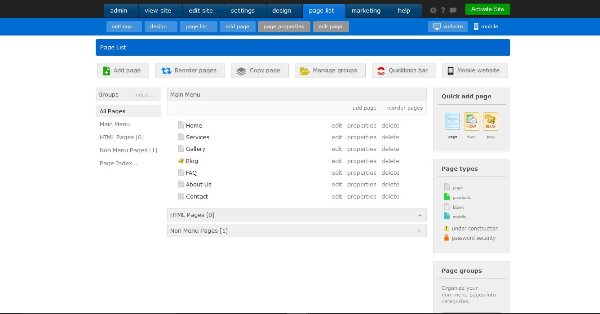
If you wish to modify, add or delete any of the pages, click the “page list” option as shown above and you will be taken to the above list of pages that are created for you by default.
From the “Page List” you can: 1. Edit the pages: by clicking the “edit” button. After clicking it, you will be redirected to the section where you can edit any part of the page that you want. Here, you can edit/add Titles, Subtitles and Content (links, videos, social media buttons) to your pages. You can also resize, delete, change or upload new images. Any of these changes can be done by clicking on the prompting green and blue buttons that appear beside the content on the page.
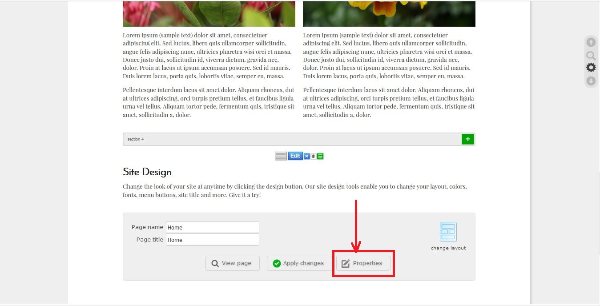
Apart from that, you can also easily change and customize the name, layout and overall design of your page menu while you are still editing the rest of your page. To do this, scroll down to the “Site Design” menu that is almost at the bottom of the page and click on “Properties”
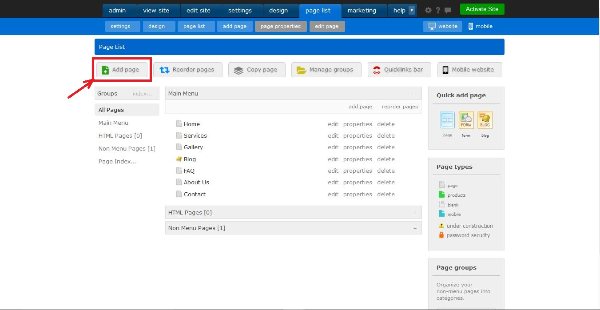
After everything is done, click on “apply changes” and all your edits will be applied to your page. 2. Delete a page: by hitting the “delete” button 3. Add a page: by selecting the “add page” button: see more instructions below. 4. Rearrange the pages: in any order that you want by clicking the “reorder pages” button HOW TO ADD A NEW PAGE
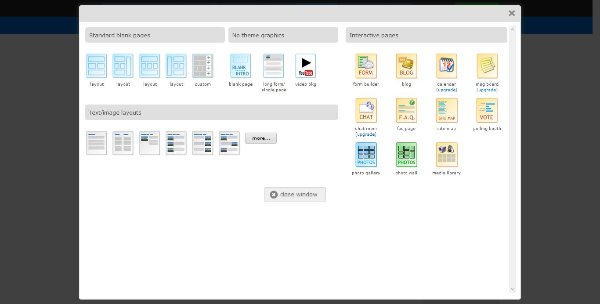
Whatever layout you choose from the ones available in the four menus (Standard blank pages, No theme graphics, Interactive pages, Text/image layouts), you will be prompted to select the Page Name and the Page Location. The Page Location is basically where you want your page to be located on your website, you can choose between ‘main menu’ and ‘non-menu pages’ or from the drop-down arrow, choose to add it as a sub-page of a page that is already on your website. Each page is preloaded with content sections to help you better control where and how your information, products, or images are arranged. To add any kind of content, just click any of the green + buttons at the top of each section. You can add as many different types of content to each section as you like. You can also divide content sections into additional sections to have even more control. The configuration options are endless.
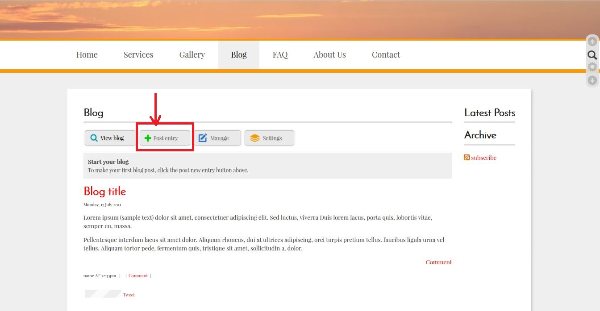
HOW TO ADD AND PUBLISH NEW POST From the list of pages on the “Page List” menu, click on “Blog” and you will be redirected to the home page of your blog section.
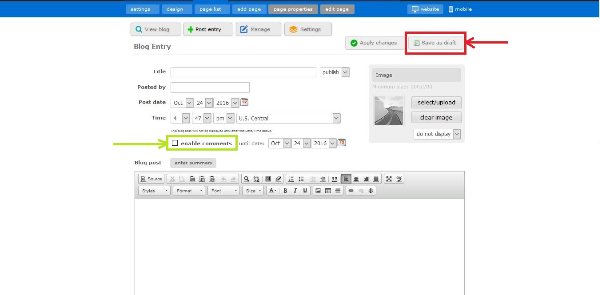
You can add images to your post to make it more attractive and customize the text, format or layout of your post as you wish. The section for adding text looks a lot like Microsoft Word, so working on the text will be just as simple as what you are used to do when you are editing a Word document. When everything is done, you can publish it by clicking the “Apply Changes” button and it will be live in a few seconds. However, if you don’t feel like publishing you can click “save as draft” then you can continue working on it later. If you wish, you can also enable comments of your post so that your audience can share their thoughts on what you have published. Just check the “enable comments” box
CONGRATULATIONS ON CREATING YOUR FIRST WEBSITE!! Last but Not Least! |


Site Mailing List
Get your business on the Web, FAST and EASY.
|

